Git & GitHub Setup Guide
Before we start building websites, we need to set up Git and GitHub. Think of Git as a way to track changes in your code (like a super-powered “undo” button), and GitHub as a place to store and share your projects online. We’ll learn this properly in class, don’t worry too much about it for now. Once it’s set up, you’ll barely think about it. The payoff of being able to track your work, collaborate with others, and deploy your sites—is totally worth the initial setup.
Part 1: Setting Up Git
For Mac Users
Step 1: Install Homebrew
Homebrew is a package manager that makes installing things on Mac much easier. Open Terminal (you can find it in Applications > Utilities or just search for it) and paste this command:
/bin/bash -c "$(curl -fsSL https://raw.githubusercontent.com/Homebrew/install/HEAD/install.sh)"Hit enter and let it do its thing. It might ask for your password and that’s normal.
Step 2: Add Homebrew to your PATH
This tells your computer where to find Homebrew. Copy and paste these two lines one at a time:
echo 'eval "$(/opt/homebrew/bin/brew shellenv)"' >> ~/.zshrc
source ~/.zshrc
Step 3: Install Git
Now the fun part—installing Git is just one command:
brew install gitBy the way, you can now install a lot of software like this, through Single line commands!
Step 4: Check if it worked
Type this to make sure Git is installed:
git --versionYou should see something like git version 2.39.0 or similar. The exact numbers don’t matter.
For Windows Users
Step 1: Download Git
Go to git-scm.com and click the download button. It should automatically detect you’re on Windows.
Step 2: Install Git
Run the installer you just downloaded, the defaults are fine. Just keep clicking “Next.”
Step 3: Open Git Bash
After installation, you should have a new program called “Git Bash.” Open it—this is where you’ll type Git commands. It’s like Terminal on Mac.
Step 4: Check if it worked
Type this in Git Bash:
git --versionYou should see the Git version number.
Part 2: Setting Up GitHub
Create a GitHub Account
- Go to github.com and click “Sign up”
- Choose a username you like and complete the process
Configure Git with your GitHub info
Now we need to tell Git who you are. In Terminal (Mac) or Git Bash (Windows), type these commands, replacing the placeholder text with your actual information:
git config --global user.name "Your Name"
git config --global user.email "your.email@example.com"Important: Use the same email address you used for GitHub. This is how GitHub knows the changes that will come to it are from you.
After this, you’re all set! We’ll be using these tools throughout the class, but don’t worry about memorizing all the commands, we’ll learn the Git workflow gradually as we build our websites.
Pretty Formatting Your Code
While you’re writing code in VSCode, things can get messy and hard for you to keep track of. VSCode gives you nice color highlighting but we can also install a formatter to help keep us organized.
Open up your extensions panel and search for ‘Prettier’. It is the first result which has the most downloads.
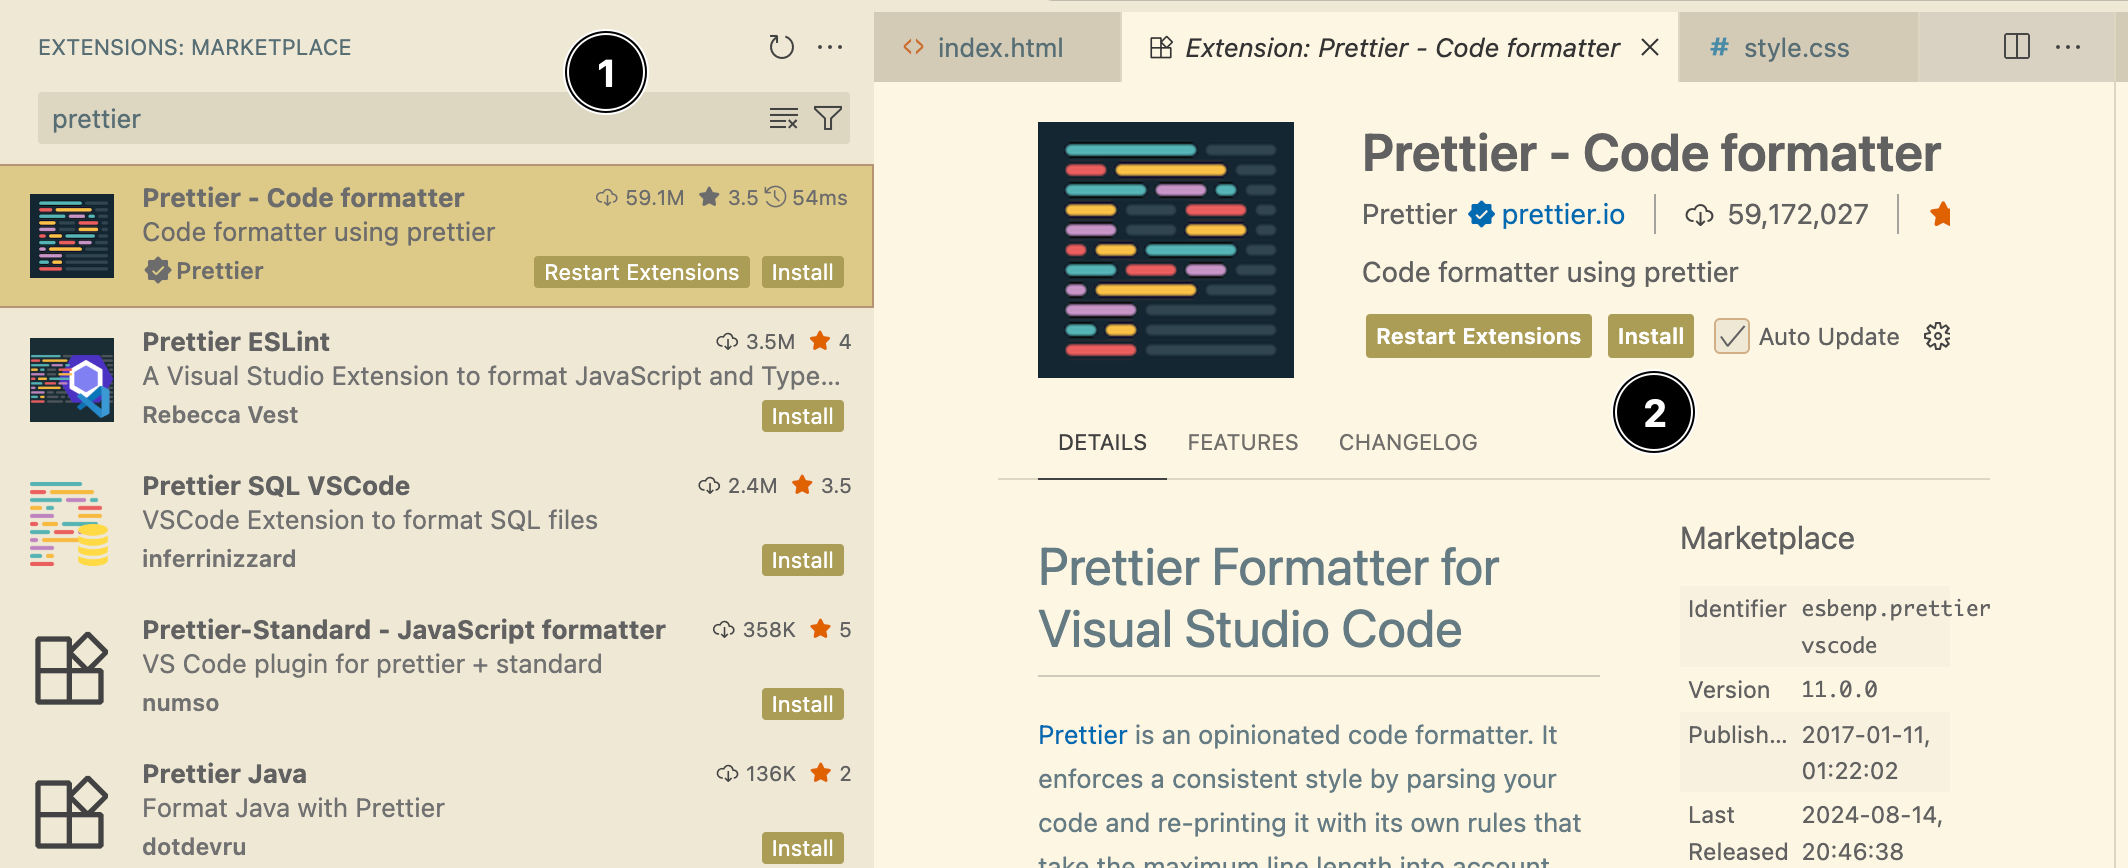
Click Install.
After it installs, you have to edit your VSCode settings in a way that tells it to use this formatter every time you hit save.
Open up the command palette in VSCode using CTRL + SHIFT + P. Search for ‘Settings’.
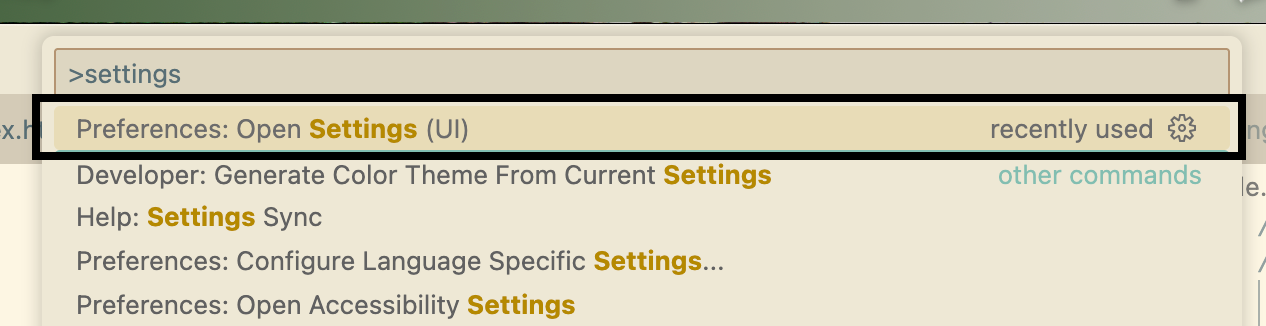
Select the one that says ‘Preferences: Open Settings (UI)‘.
It will open up something that looks like this:
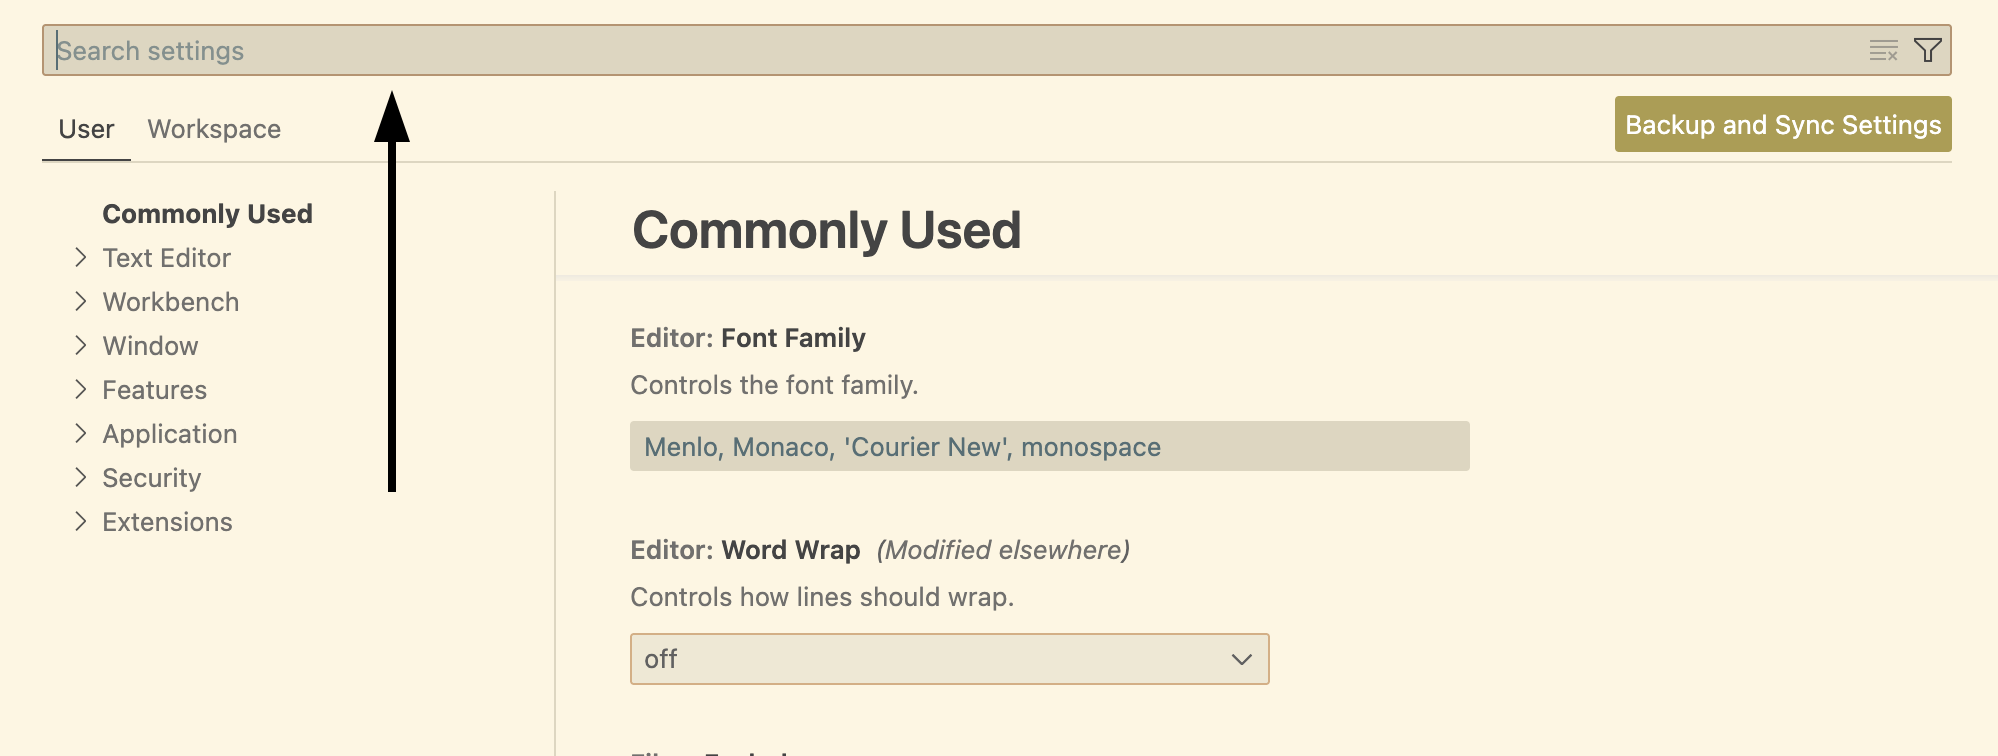
In the search field, search and configure the following things.
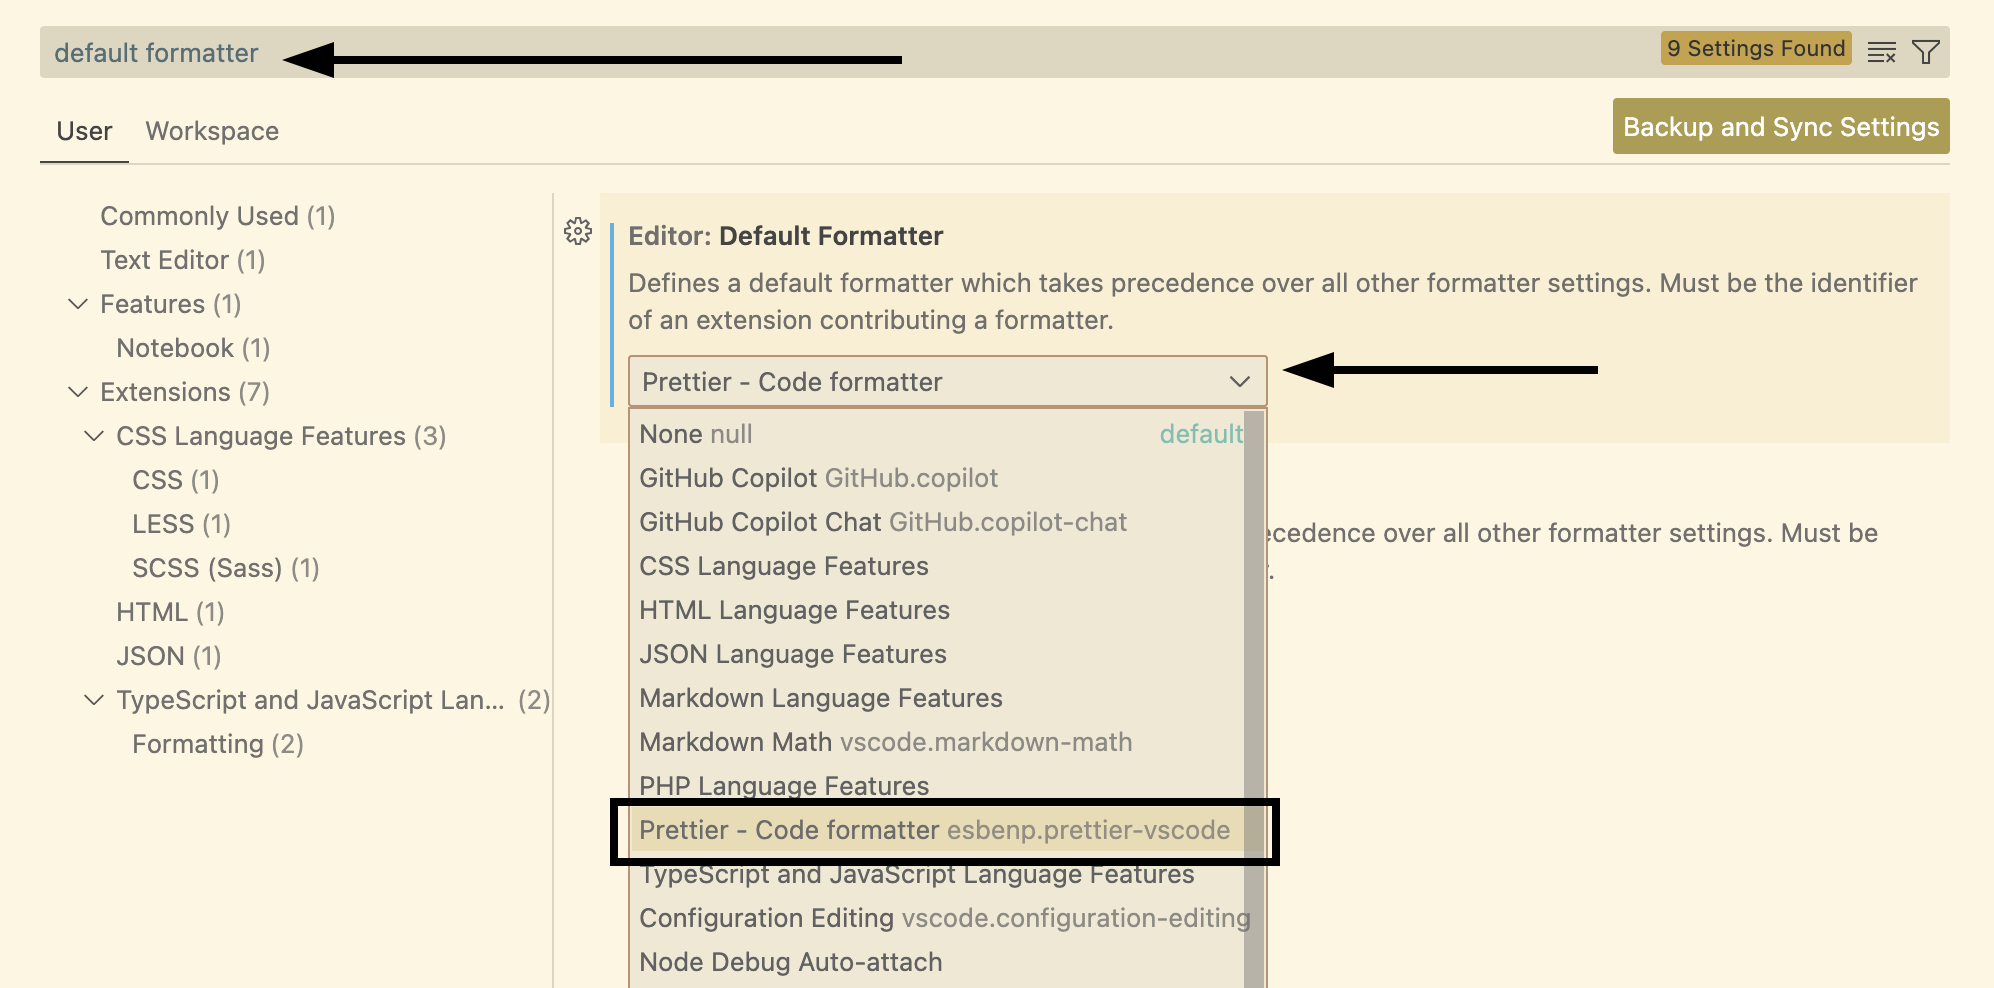
- Default Formatter: Search for
Default Formatterand the listings should filter. In the dropdown for that setting, locatePrettierand select it.
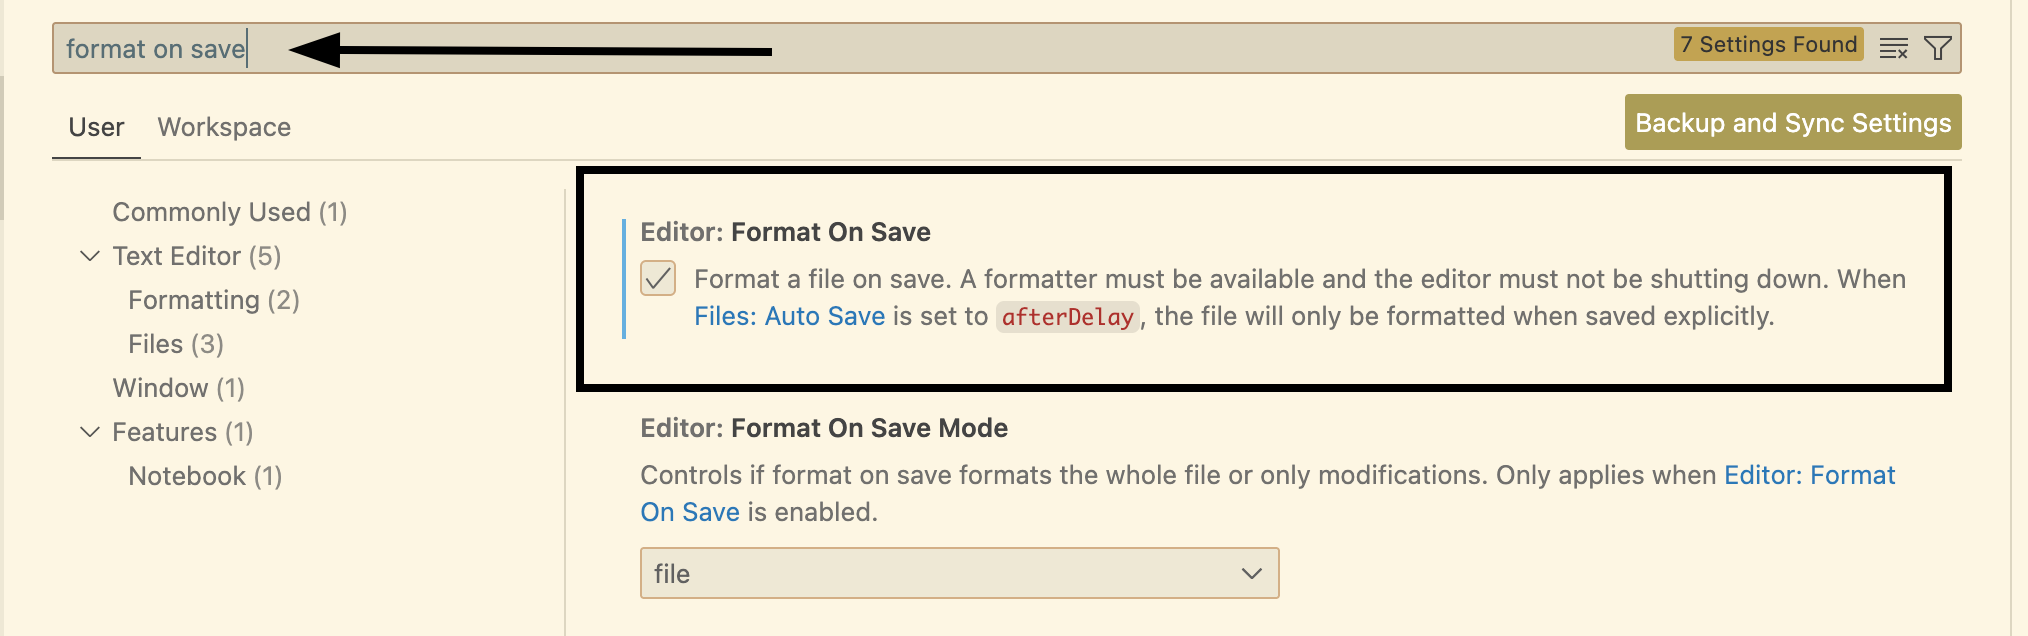
- Format on save: Now that the default formatter has been set, we can tell VSCode to correct our code every time we hit save. Search for
Format on Saveand enable the checkbox.
You’re done! Now no matter how you type your code, all your files will be kept nicely formatted whenever you hit save. It’s a small quality-of-life improvement.